DC-Sonar - Analyzing AD Domains For Security Risks Related To User Accounts
DC Sonar Community
Repositories
The project consists of repositories:
Disclaimer
It's only for education purposes.
Avoid using it on the production Active Directory (AD) domain.
Neither contributor incur any responsibility for any using it.
Social media
Check out our Red Team community Telegram channel
Description
Architecture
For the visual descriptions, open the diagram files using the diagrams.net tool.
The app consists of:
- The dc-sonar-frontend is the fronted part of the user web interface bases on:
- The dc-sonar-user-layer is the backend part of the web app bases on:
- The dc-sonar-workers-layer is the logic layer that performs and runs analyzing processes which base on:
- The ntlm-scrutinizer is the NTLM hashes performer with REST API based on:
Functionallity
The DC Sonar Community provides functionality for analyzing AD domains for security risks related to accounts:
-
Register analyzing AD domain in the app
-
See the statuses of domain analyzing processes
-
Dump and brute NTLM hashes from set AD domains to list accounts with weak and vulnerable passwords
-
Analyze AD domain accounts to list ones with never expire passwords
-
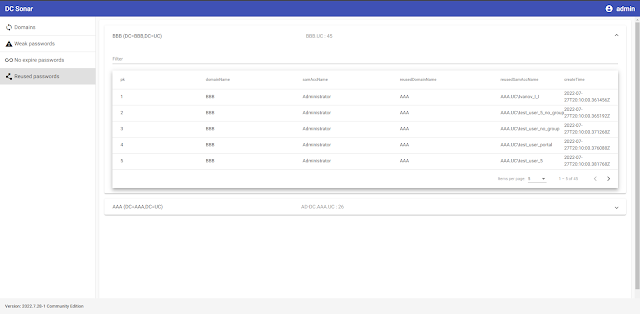
Analyze AD domain accounts by their NTLM password hashes to determine accounts and domains where passwords repeat


Installation
Docker
In progress ...
Manually using dpkg
It is assumed that you have a clean Ubuntu Server 22.04 and account with the username "user".
The app will install to /home/user/dc-sonar.
The next releases maybe will have a more flexible installation.
Download dc_sonar_NNNN.N.NN-N_amd64.tar.gz from the last distributive to the server.
Create a folder for extracting files:
mkdir dc_sonar_NNNN.N.NN-N_amd64Extract the downloaded archive:
tar -xvf dc_sonar_NNNN.N.NN-N_amd64.tar.gz -C dc_sonar_NNNN.N.NN-N_amd64Go to the folder with the extracted files:
cd dc_sonar_NNNN.N.NN-N_amd64/Install PostgreSQL:
sudo bash install_postgresql.shInstall RabbitMQ:
sudo bash install_rabbitmq.shInstall dependencies:
sudo bash install_dependencies.shIt will ask for confirmation of adding the ppa:deadsnakes/ppa repository. Press Enter.
Install dc-sonar itself:
sudo dpkg -i dc_sonar_NNNN.N.NN-N_amd64.debIt will ask for information for creating a Django admin user. Provide username, mail and password.
It will ask for information for creating a self-signed SSL certificate twice. Provide required information.
Open: https://localhost
Enter Django admin user credentials set during the installation process before.
Style guide
See the information in STYLE_GUIDE.md
Deployment for development
Docker
In progress ...
Manually using Windows host and Ubuntu Server guest
In this case, we will set up the environment for editing code on the Windows host while running Python code on the Ubuntu guest.
Set up the virtual machine
Create a virtual machine with 2 CPU, 2048 MB RAM, 10GB SSD using Ubuntu Server 22.04 iso in VirtualBox.
If Ubuntu installer asks for updating ubuntu installer before VM's installation - agree.
Choose to install OpenSSH Server.
VirtualBox Port Forwarding Rules:
| Name | Protocol | Host IP | Host Port | Guest IP | Guest Port |
|---|---|---|---|---|---|
| SSH | TCP | 127.0.0.1 | 2222 | 10.0.2.15 | 22 |
| RabbitMQ management console | TCP | 127.0.0.1 | 15672 | 10.0.2.15 | 15672 |
| Django Server | TCP | 127.0.0.1 | 8000 | 10.0.2.15 | 8000 |
| NTLM Scrutinizer | TCP | 127.0.0.1 | 5000 | 10.0.2.15 | 5000 |
| PostgreSQL | TCP | 127.0.0.1 | 25432 | 10.0.2.15 | 5432 |
Config Window
Download and install Python 3.10.5.
Create a folder for the DC Sonar project.
Go to the project folder using Git for Windows:
cd '{PATH_TO_FOLDER}'Make Windows installation steps for dc-sonar-user-layer.
Make Windows installation steps for dc-sonar-workers-layer.
Make Windows installation steps for ntlm-scrutinizer.
Make Windows installation steps for dc-sonar-frontend.
Set shared folders
Make steps from "Open VirtualBox" to "Reboot VM", but add shared folders to VM VirtualBox with "Auto-mount", like in the picture below:

After reboot, run command:
sudo adduser $USER vboxsfPerform logout and login for the using user account.
In /home/user directory, you can use mounted folders:
ls -lOutput:
total 12
drwxrwx--- 1 root vboxsf 4096 Jul 19 13:53 dc-sonar-user-layer
drwxrwx--- 1 root vboxsf 4096 Jul 19 10:11 dc-sonar-workers-layer
drwxrwx--- 1 root vboxsf 4096 Jul 19 14:25 ntlm-scrutinizerConfig Ubuntu Server
Config PostgreSQL
Install PostgreSQL on Ubuntu 20.04:
sudo apt update
sudo apt install postgresql postgresql-contrib
sudo systemctl start postgresql.service
Create the admin database account:
sudo -u postgres createuser --interactiveOutput:
Enter name of role to add: admin
Shall the new role be a superuser? (y/n) yCreate the dc_sonar_workers_layer database account:
sudo -u postgres createuser --interactiveOutput:
Enter name of role to add: dc_sonar_workers_layer
Shall the new role be a superuser? (y/n) n
Shall the new role be allowed to create databases? (y/n) n
Shall the new role be allowed to create more new roles? (y/n) nCreate the dc_sonar_user_layer database account:
sudo -u postgres createuser --interactiveOutput:
Enter name of role to add: dc_sonar_user_layer
Shall the new role be a superuser? (y/n) n
Shall the new role be allowed to create databases? (y/n) n
Shall the new role be allowed to create more new roles? (y/n) nCreate the back_workers_db database:
sudo -u postgres createdb back_workers_dbCreate the web_app_db database:
sudo -u postgres createdb web_app_dbRun the psql:
sudo -u postgres psqlSet a password for the admin account:
ALTER USER admin WITH PASSWORD '{YOUR_PASSWORD}';
Set a password for the dc_sonar_workers_layer account:
ALTER USER dc_sonar_workers_layer WITH PASSWORD '{YOUR_PASSWORD}';
Set a password for the dc_sonar_user_layer account:
ALTER USER dc_sonar_user_layer WITH PASSWORD '{YOUR_PASSWORD}';
Grant CRUD permissions for the dc_sonar_workers_layer account on the back_workers_db database:
\c back_workers_db
GRANT CONNECT ON DATABASE back_workers_db to dc_sonar_workers_layer;
GRANT USAGE ON SCHEMA public to dc_sonar_workers_layer;
GRANT ALL ON ALL TABLES IN SCHEMA public TO dc_sonar_workers_layer;
GRANT ALL ON ALL SEQUENCES IN SCHEMA public TO dc_sonar_workers_layer;
GRANT ALL ON ALL FUNCTIONS IN SCHEMA public TO dc_sonar_workers_layer;
Grant CRUD permissions for the dc_sonar_user_layer account on the web_app_db database:
\c web_app_db
GRANT CONNECT ON DATABASE web_app_db to dc_sonar_user_layer;
GRANT USAGE ON SCHEMA public to dc_sonar_user_layer;
GRANT ALL ON ALL TABLES IN SCHEMA public TO dc_sonar_user_layer;
GRANT ALL ON ALL SEQUENCES IN SCHEMA public TO dc_sonar_user_layer;
GRANT ALL ON ALL FUNCTIONS IN SCHEMA public TO dc_sonar_user_layer;
Exit of the psql:
\q
Open the pg_hba.conf file:
sudo nano /etc/postgresql/12/main/pg_hba.confAdd the line for the connection to allow the connection from the host machine to PostgreSQL, save changes and close the file:
# IPv4 local connections:
host    all             all             127.0.0.1/32            md5
host    all             admin           0.0.0.0/0               md5
Open the postgresql.conf file:
sudo nano /etc/postgresql/12/main/postgresql.conf
Change specified below params, save changes and close the file:
listen_addresses = 'localhost,10.0.2.15'
shared_buffers = 512MB
work_mem = 5MB
maintenance_work_mem = 100MB
effective_cache_size = 1GB
Restart the PostgreSQL service:
sudo service postgresql restartCheck the PostgreSQL service status:
service postgresql statusCheck the log file if it is needed:
tail -f /var/log/postgresql/postgresql-12-main.logNow you can connect to created databases using admin account and client such as DBeaver from Windows.
Config RabbitMQ
Install RabbitMQ using the script.
Enable the management plugin:
sudo rabbitmq-plugins enable rabbitmq_managementCreate the RabbitMQ admin account:
sudo rabbitmqctl add_user admin {YOUR_PASSWORD}Tag the created user for full management UI and HTTP API access:
sudo rabbitmqctl set_user_tags admin administratorOpen management UI on http://localhost:15672/.
Install Python3.10
Ensure that your system is updated and the required packages installed:
sudo apt update && sudo apt upgrade -yInstall the required dependency for adding custom PPAs:
sudo apt install software-properties-common -yThen proceed and add the deadsnakes PPA to the APT package manager sources list as below:
sudo add-apt-repository ppa:deadsnakes/ppaDownload Python 3.10:
sudo apt install python3.10=3.10.5-1+focal1Install the dependencies:
sudo apt install python3.10-dev=3.10.5-1+focal1 libpq-dev=12.11-0ubuntu0.20.04.1 libsasl2-dev libldap2-dev libssl-devInstall the venv module:
sudo apt-get install python3.10-venvCheck the version of installed python:
python3.10 --version

Output:
Python 3.10.5
Hosts
Add IP addresses of Domain Controllers to /etc/hosts
sudo nano /etc/hosts
Layers
Set venv
We have to create venv on a level above as VM VirtualBox doesn't allow us to make it in shared folders.
Go to the home directory where shared folders located:
cd /home/userMake deploy steps for dc-sonar-user-layer on Ubuntu.
Make deploy steps for dc-sonar-workers-layer on Ubuntu.
Make deploy steps for ntlm-scrutinizer on Ubuntu.
Config modules
Make config steps for dc-sonar-user-layer on Ubuntu.
Make config steps for dc-sonar-workers-layer on Ubuntu.
Make config steps for ntlm-scrutinizer on Ubuntu.
Run
Make run steps for ntlm-scrutinizer on Ubuntu.
Make run steps for dc-sonar-user-layer on Ubuntu.
Make run steps for dc-sonar-workers-layer on Ubuntu.
Make run steps for dc-sonar-frontend on Windows.
Open https://localhost:8000/admin/ in a browser on the Windows host and agree with the self-signed certificate.
Open https://localhost:4200/ in the browser on the Windows host and login as created Django user.
 Reviewed by Zion3R
on
8:30 AM
Rating:
Reviewed by Zion3R
on
8:30 AM
Rating:


