 soteria-security/365inspect
A PowerShell script that automates the security assessment of Microsoft 365 environments.


Further the state of Microsoft 365 security by authoring a PowerShell script that automates the security assessment of Microsoft 365 environments.
Soteria Inspect is born from the 365Inspect project and is Soteria's SaaS solution to aid in assessing the security of a Microsoft 365 tenant with over 200 points of inspection across the full suite of Microsoft 365 services.
Soteria Inspect for Microsoft 365 allows customers to track changes to each finding's affected objects over time as well as remediation efforts, and now includes multi-tenancy for MSP's and parent organizations to keep a finger on the pulse of their child tenants.
Soteria Inspect for Microsoft 365 is available directly through Soteria or through the Azure Marketplace
See all of our Soteria Inspect for Microsoft 365 offers
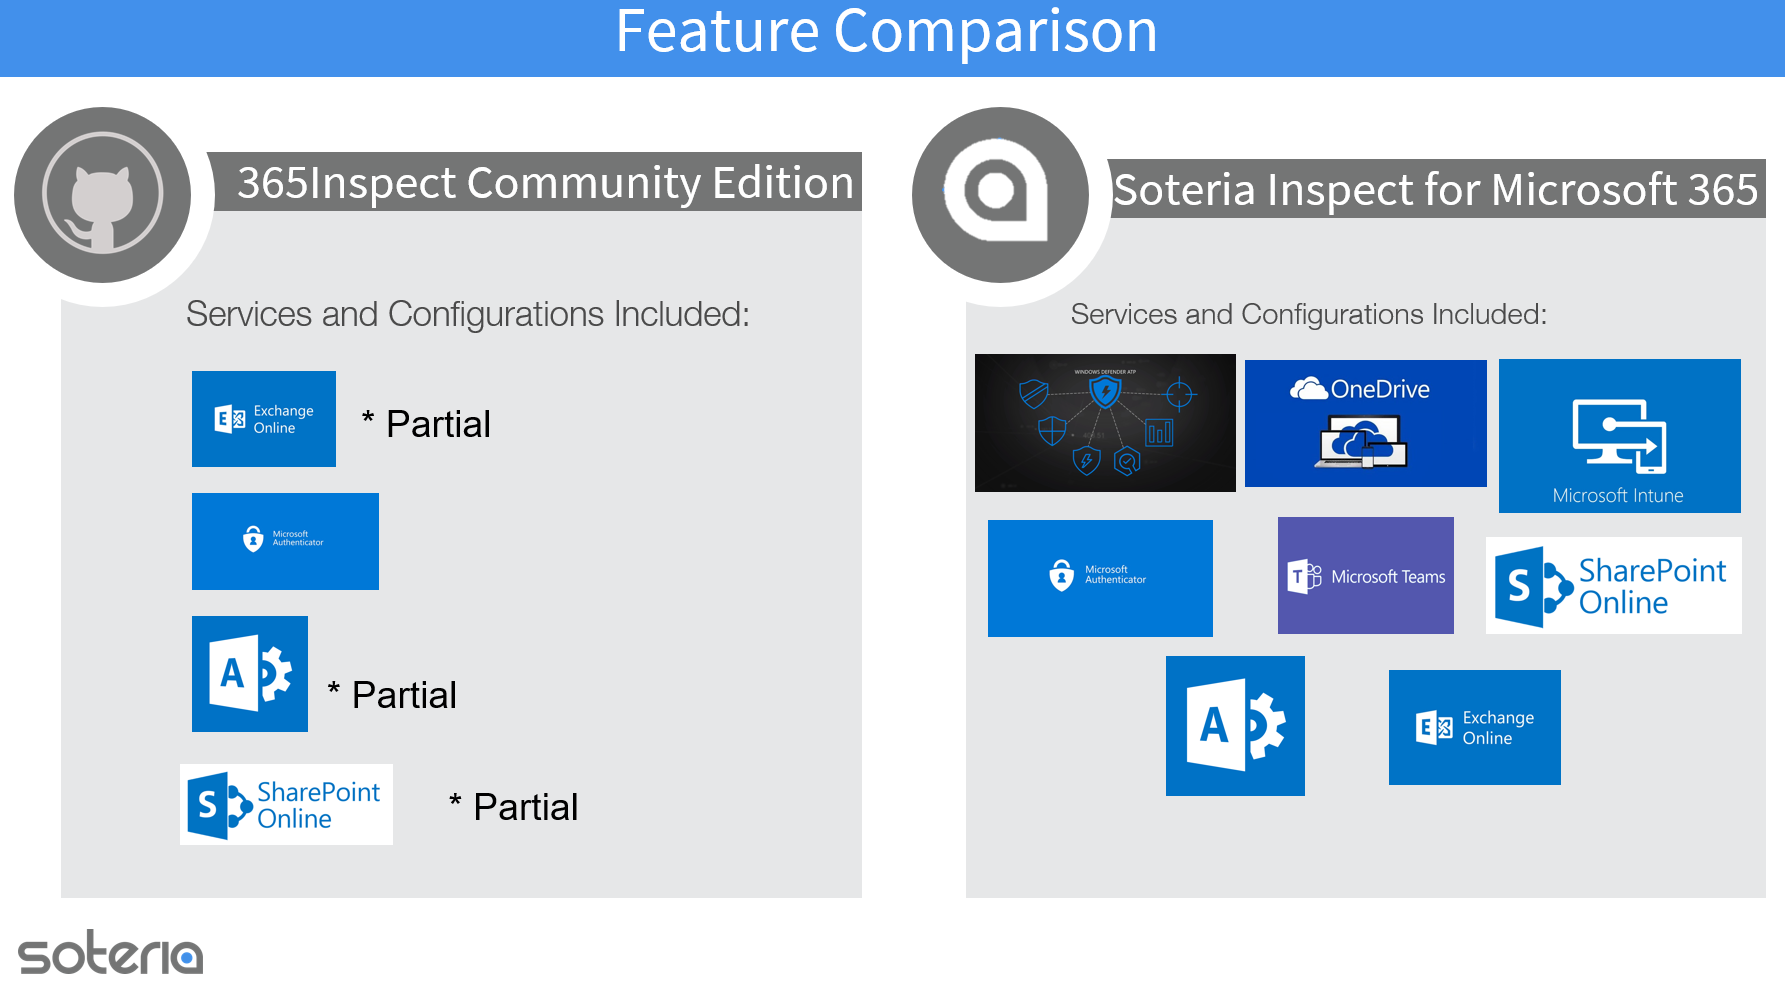
365Inspect Community Edition requires the administrative PowerShell modules for Exchange administration, Microsoft Graph, Microsoft Teams, and the Sharepoint administration module.
365Inspect is now compatible with PowerShell Core (6+), and requires a Microsoft Windows operating system due to required module dependencies.
The 365Inspect.ps1 PowerShell script will validate the installed modules and minimum version of the modules necessary for the Inspectors to function.
If you do not have these modules installed, you will be prompted to install them, and with your approval, the script will attempt installation. Otherwise, you should be able to install them with the following commands in an administrative PowerShell prompt, or by following the instructions at the references below:
Install-Module -Name ExchangeOnlineManagement -AllowClobber -Force

Install-Module -Name PnP.PowerShell -AllowClobber -Force

Install-Module -Name Microsoft.Graph -AllowClobber -Force

Install-Module -Name MicrosoftTeams -AllowClobber -Force
Install Exchange Online PowerShell
Install SharePoint PnP PowerShell Module
Once the above are installed, download the 365Inspect source code folder from Github using your browser or by using git clone.
As of September 9, 2024, PnP.PowerShell requires tenant admins to register their own application for use with the SharePoint/PnP service. See the following PnP.PowerShell documentation for required steps. Register an Entra ID Application to use with PnP PowerShell Determine Permissions Authentication
NOTE: If you are using PowerShell 5.1 PnP PowerShell is no longer compatible and all SharePoint Inspectors will be excluded at run time.
There is a command that can be run to automate this step.
Register-PnPEntraIDAppForInteractiveLogin -ApplicationName "PnP Rocks" -Tenant [yourtenant].onmicrosoft.com -Interactive
Remember the name or the Application/Client ID of the application that was created. This is now required to authenticate and you will be prompted for the AppID!
Currently the Microsoft.Graph and Microsoft.Graph.Beta Modules versions 2.23.0 are incompatible with ExchangeOnlineManagement version 3.5.1 The following versions are compatible:
The following commands may be used to install compatible versions:
Install-Module -Name Microsoft.Graph -Scope CurrentUser -RequiredVersion 2.21.1 -AllowClobber -Force
Install-Module -Name Microsoft.Graph.Beta -Scope CurrentUser -RequiredVersion 2.21.1 -AllowClobber -Force
Install-Module -Name ExchangeOnlineManagement -Scope CurrentUser -RequiredVersion 3.5.0 -AllowClobber -Force
As you will run 365Inspect with administrative privileges, you should place it in a logical location and make sure the contents of the folder are readable and writable only by the administrative user. This is especially important if you intend to install 365Inspect in a location where it will be executed frequently or used as part of an automated process. NOTE: 365Inspect does not need to be run in an administrative PowerShell window to function.
To run 365Inspect, open a PowerShell console and navigate to the folder you downloaded 365Inspect into:
cd 365Inspect
You will interact with 365Inspect by executing the main script file, 365Inspect.ps1, from within the PowerShell command prompt.
All 365Inspect requires to inspect your M365 tenant is access via an M365 account with proper permissions, so most of the command line parameters relate to the organization being assessed and the method of authentication.
Execution of 365Inspect looks like this:
.\365Inspect.ps1 -OutPath <value> -UserPrincipalName [email protected] -Auth <MFA|DEVICE|ALREADY_AUTHED|APP> -pnpPowerShellApplicationId <Your Pnp PowerShell Application/Client ID>
For example, to log in by entering your credentials in a browser with MFA support:
.\365Inspect.ps1 -OutPath ..\365_report -UserPrincipalName [email protected] -Auth MFA
To login to a Government or other National Cloud Deployment (China, Germany, etc.) the -Environment parameter should be specified as follows:
.\365Inspect.ps1 -OutPath ..\365_report -UserPrincipalName [email protected] -Auth MFA -Environment USGovGCCHigh
Valid arguments for the -Environment are:
Application Authentication can be achieved by executing the script with the following parameters:
.\365Inspect.ps1 -OutPath ..\365_report -UserPrincipalName [email protected] -Auth APP
To login to a Government or other National Cloud Deployment (China, Germany, etc.) the -Environment parameter should be specified as follows:
.\365Inspect.ps1 -OutPath ..\365_report -UserPrincipalName [email protected] -Auth APP -Environment USGovGCCHigh
